

はじめに
以下のチュートリアルを実行する。
Amazon SageMaker Studio、SageMaker Studio notebook、およびSageMaker Studioドメインについて説明します。
SageMaker Studio
SageMaker Studioは、Amazon SageMakerの中で提供される統合開発環境(IDE)です。機械学習のモデル開発、トレーニング、デプロイまでのすべてのプロセスを一つの環境で行えるのが特徴です。次のような特徴があります:
- ビジュアルインターフェース: コードを書くことなく、データの前処理、トレーニング、モデルのデプロイを行うことができます。
- ノートブックの管理: Jupyterノートブックを活用し、開発作業をスムーズに進めることができます。
- 完全な統合: SageMakerの他の機能(AutoML、トレーニング、推論エンドポイント)をすべて統合して利用可能。
SageMaker Studio notebook
SageMaker Studio notebookは、Jupyterノートブックの一種で、SageMaker Studio内で使用できるノートブック環境です。Pythonコードを書いて機械学習モデルの開発やデータ処理を行います。
- Jupyterベース: SageMaker Studio notebookは、一般的なJupyterノートブックに似た環境ですが、SageMaker専用の機能やリソースに簡単にアクセスできるようにカスタマイズされています。
- スケーラビリティ: 必要に応じて計算リソース(インスタンスタイプ)を動的に変更することが可能です。
- クラウドベース: ローカル環境ではなく、クラウド上で実行されるため、いつでもどこからでもアクセス可能です。
SageMaker Studioドメイン
SageMaker Studioドメインは、SageMaker Studioの環境を管理するための基盤です。ユーザーがSageMaker Studioを使うためには、まずこのドメインを設定する必要があります。具体的には、以下の要素を含みます:
- ユーザー管理: 複数のユーザーがSageMaker Studioを利用する場合、各ユーザーの設定やアクセス権を管理します。
- ネットワーク構成: VPC(Virtual Private Cloud)やセキュリティグループなど、ネットワーク関連の設定を含むため、アクセス制御やデータ保護を行えます。
- SageMakerリソースの管理: ノートブックやトレーニングジョブ、エンドポイントなどのSageMakerリソースを管理し、各ユーザーが使用する環境を提供します。
チュートリアル実行
SageMaker Studioドメインの生成
Amazon SageMakerでは、コンソールを使った視覚的な方法や、SageMaker StudioやSageMakerノートブックを使ったプログラム的な方法でモデルをデプロイできます。このチュートリアルでは、SageMaker Studioノートブックを使用してプログラム的にモデルをデプロイしますが、SageMaker Studioドメインが必要です。
以下のCloudFormationテンプレートからスタックを生成する
- スタック名:CFN-SM-IM-Lambda-Catalog
- SageMaker Studioドメイン名:StudioDomain
- UserProfileName:studio-user
- 生成される主なリソース
SageMaker Studio notebookの生成
このステップでは、新しいSageMaker Studioノートブックインスタンスを起動し、必要なオープンソースライブラリをインストールし、Amazon S3から訓練済みモデルのアーティファクト(成果物)を取得するために必要なSageMakerの変数を設定します。しかし、このモデルアーティファクトは直接推論にデプロイすることができないため、最初にモデルアーティファクトからSageMakerモデルを作成する必要があります。この作成されたモデルには、SageMakerがモデルをデプロイするために使用する訓練コードと推論コードが含まれます。
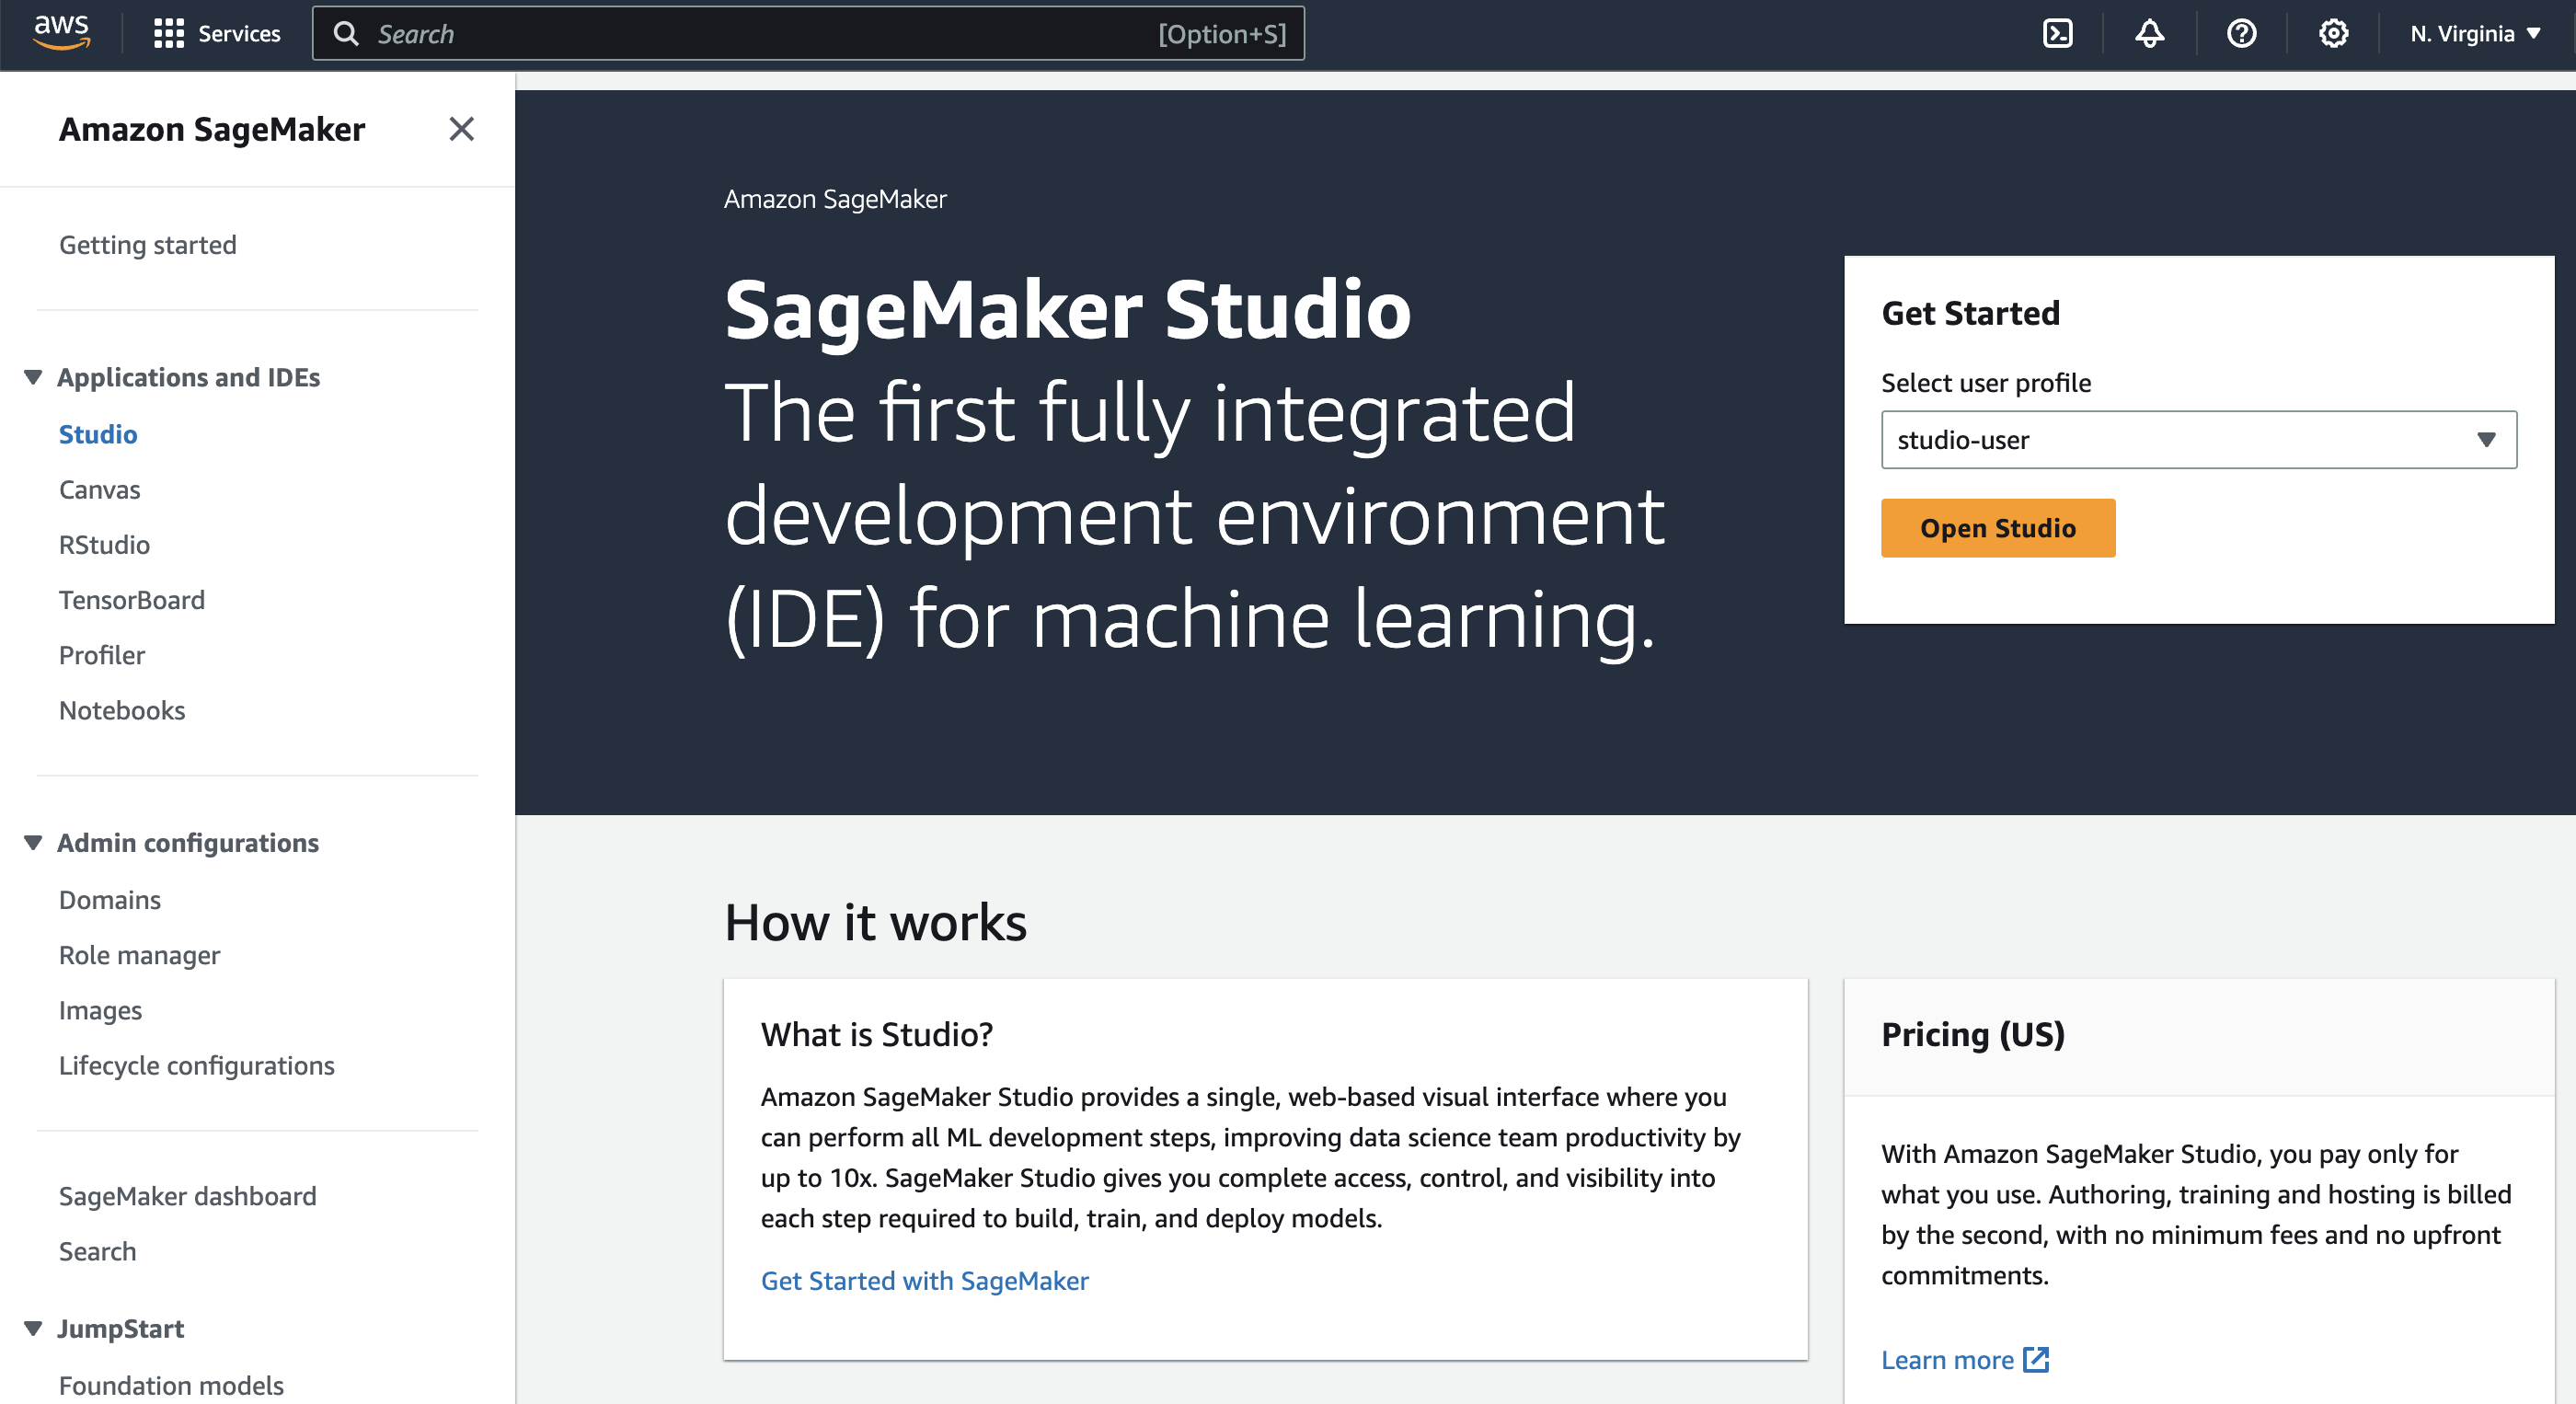
ユーザープロファイルを選択し、Studioを開く
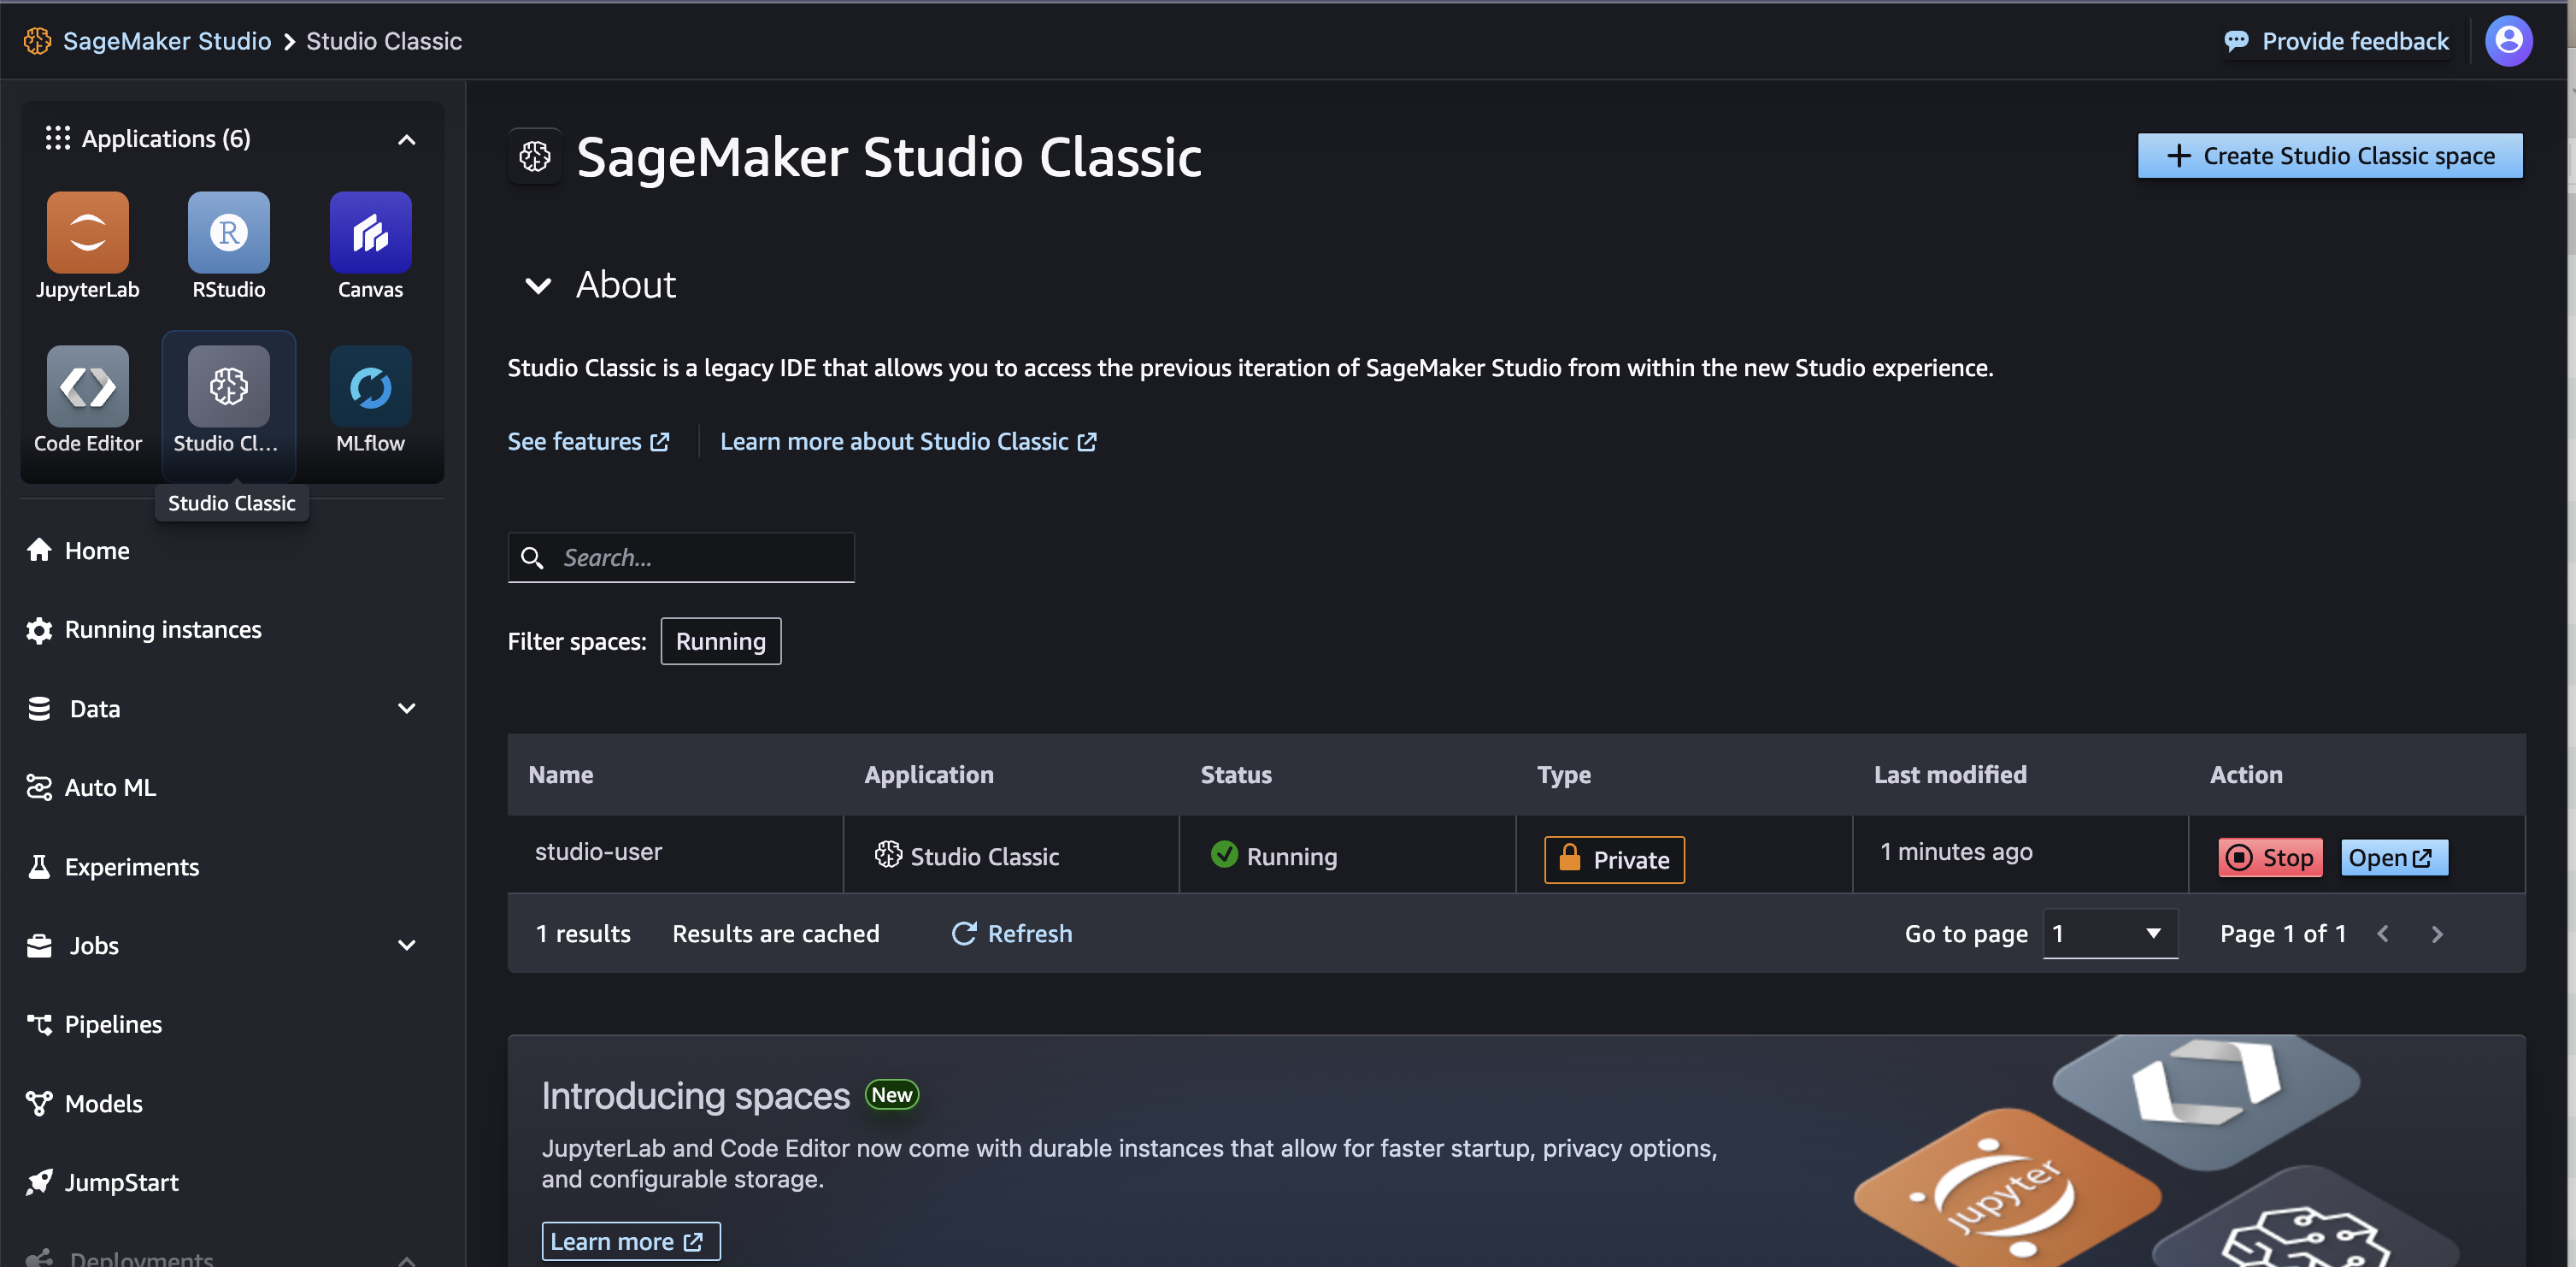
Studio Classicアプリをクリック、ActionのOpenボタンをクリックする
File > New > Notebookを選択する

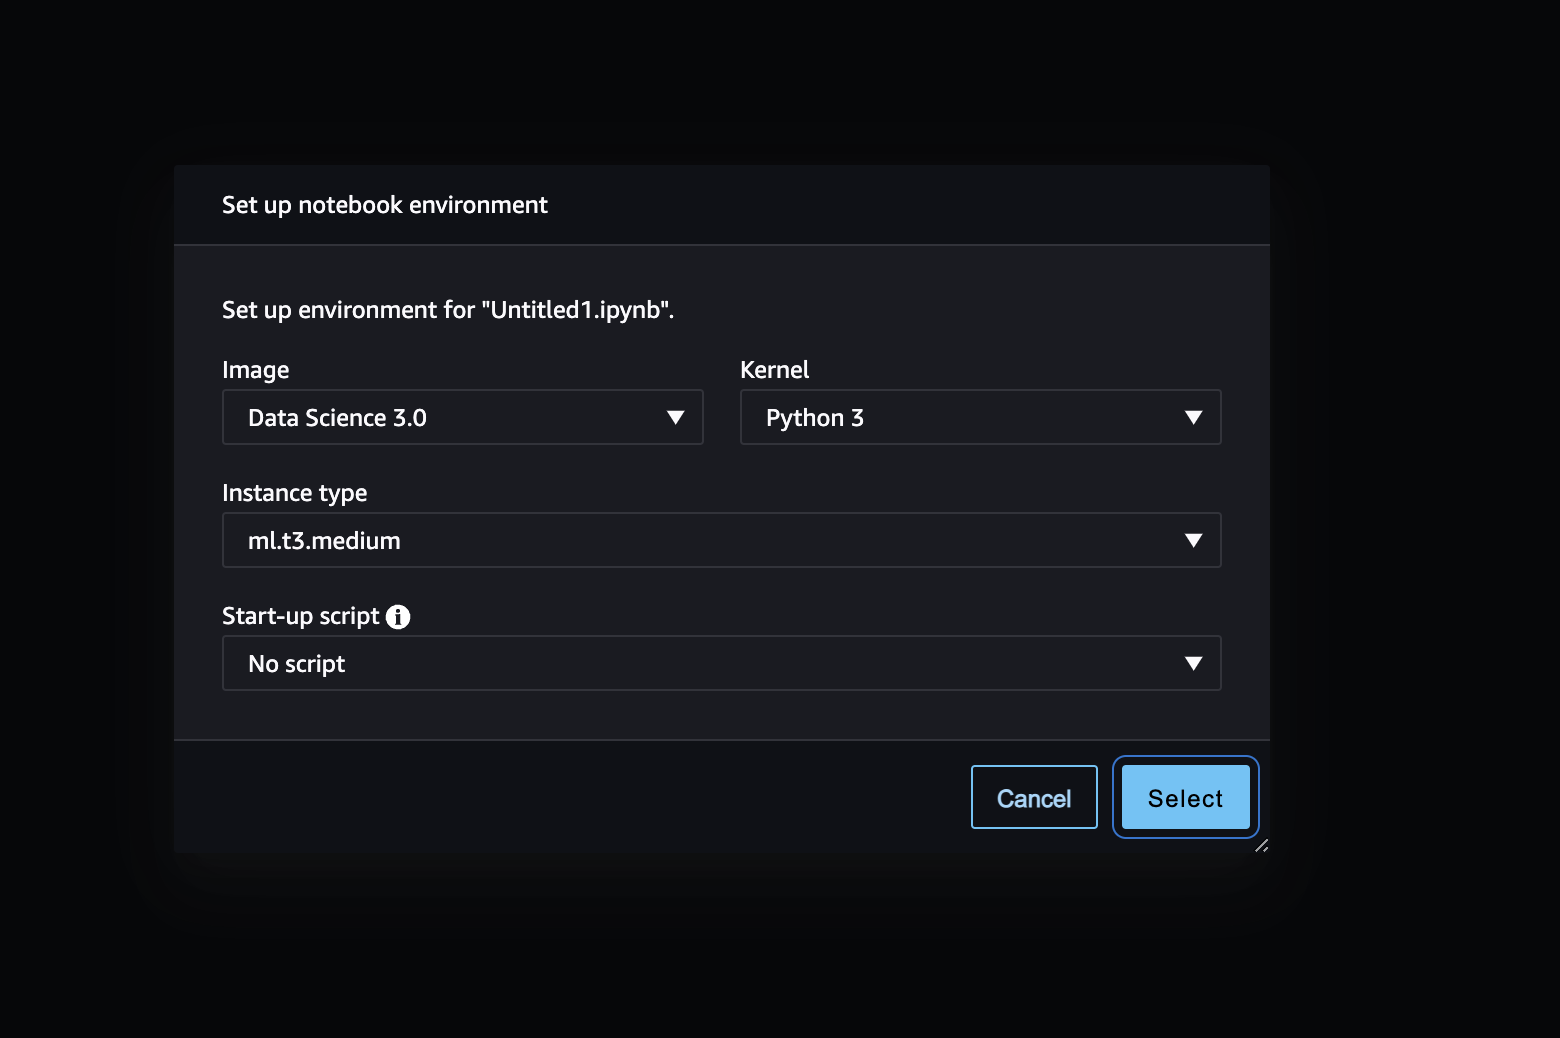
条件を選択し、Notebookを生成する
%pip install --upgrade -q aiobotocoreimport pandas as pd
import numpy as np
import boto3
import sagemaker
import time
import json
import io
from io import StringIO
import base64
import pprint
import re
from sagemaker.image_uris import retrieve
sess = sagemaker.Session()
write_bucket = sess.default_bucket()
write_prefix = "fraud-detect-demo"
region = sess.boto_region_name
s3_client = boto3.client("s3", region_name=region)
sm_client = boto3.client("sagemaker", region_name=region)
sm_runtime_client = boto3.client("sagemaker-runtime")
sm_autoscaling_client = boto3.client("application-autoscaling")
sagemaker_role = sagemaker.get_execution_role()
# S3 locations used for parameterizing the notebook run
read_bucket = "sagemaker-sample-files"
read_prefix = "datasets/tabular/synthetic_automobile_claims"
model_prefix = "models/xgb-fraud"
data_capture_key = f"{write_prefix}/data-capture"
# S3 location of trained model artifact
model_uri = f"s3://{read_bucket}/{model_prefix}/fraud-det-xgb-model.tar.gz"
# S3 path where data captured at endpoint will be stored
data_capture_uri = f"s3://{write_bucket}/{data_capture_key}"
# S3 location of test data
test_data_uri = f"s3://{read_bucket}/{read_prefix}/test.csv" RealTime Inference Endpointの生成
SageMakerでは、訓練済みモデルをリアルタイム推論エンドポイントにデプロイする方法が複数あります。SageMaker SDK、AWS SDK(Boto3)、SageMakerコンソールです。SageMaker SDKは抽象度が高く、AWS SDK – Boto3は低レベルAPIを提供し、より細かい制御が可能です。このチュートリアルではAWS SDK – Boto3を使ってモデルをデプロイします。デプロイには次の3ステップがあります:
- モデルアーティファクトからSageMakerモデルを作成
- インスタンスタイプや数を含むエンドポイント構成を作成
- エンドポイント構成を使用してエンドポイントを作成
Amazon S3に保存された訓練済みモデルのアーティファクトを使ってSageMakerモデルを作成するには、以下のコードをコピーして実行するように指示されています。create_model メソッドは、トレーニングに使用されたDockerコンテナ(この例ではXGBoostコンテナ)と、Amazon S3内のモデルアーティファクトの場所を引数として受け取ります。これにより、トレーニング済みモデルをSageMakerにデプロイする準備が整います。
SageMakerモデルの生成
# Retrieve the SageMaker managed XGBoost image
training_image = retrieve(framework="xgboost", region=region, version="1.3-1")
# Specify a unique model name that does not exist
model_name = "fraud-detect-xgb"
primary_container = {
"Image": training_image,
"ModelDataUrl": model_uri
}
model_matches = sm_client.list_models(NameContains=model_name)["Models"]
if not model_matches:
model = sm_client.create_model(ModelName=model_name,
PrimaryContainer=primary_container,
ExecutionRoleArn=sagemaker_role)
else:
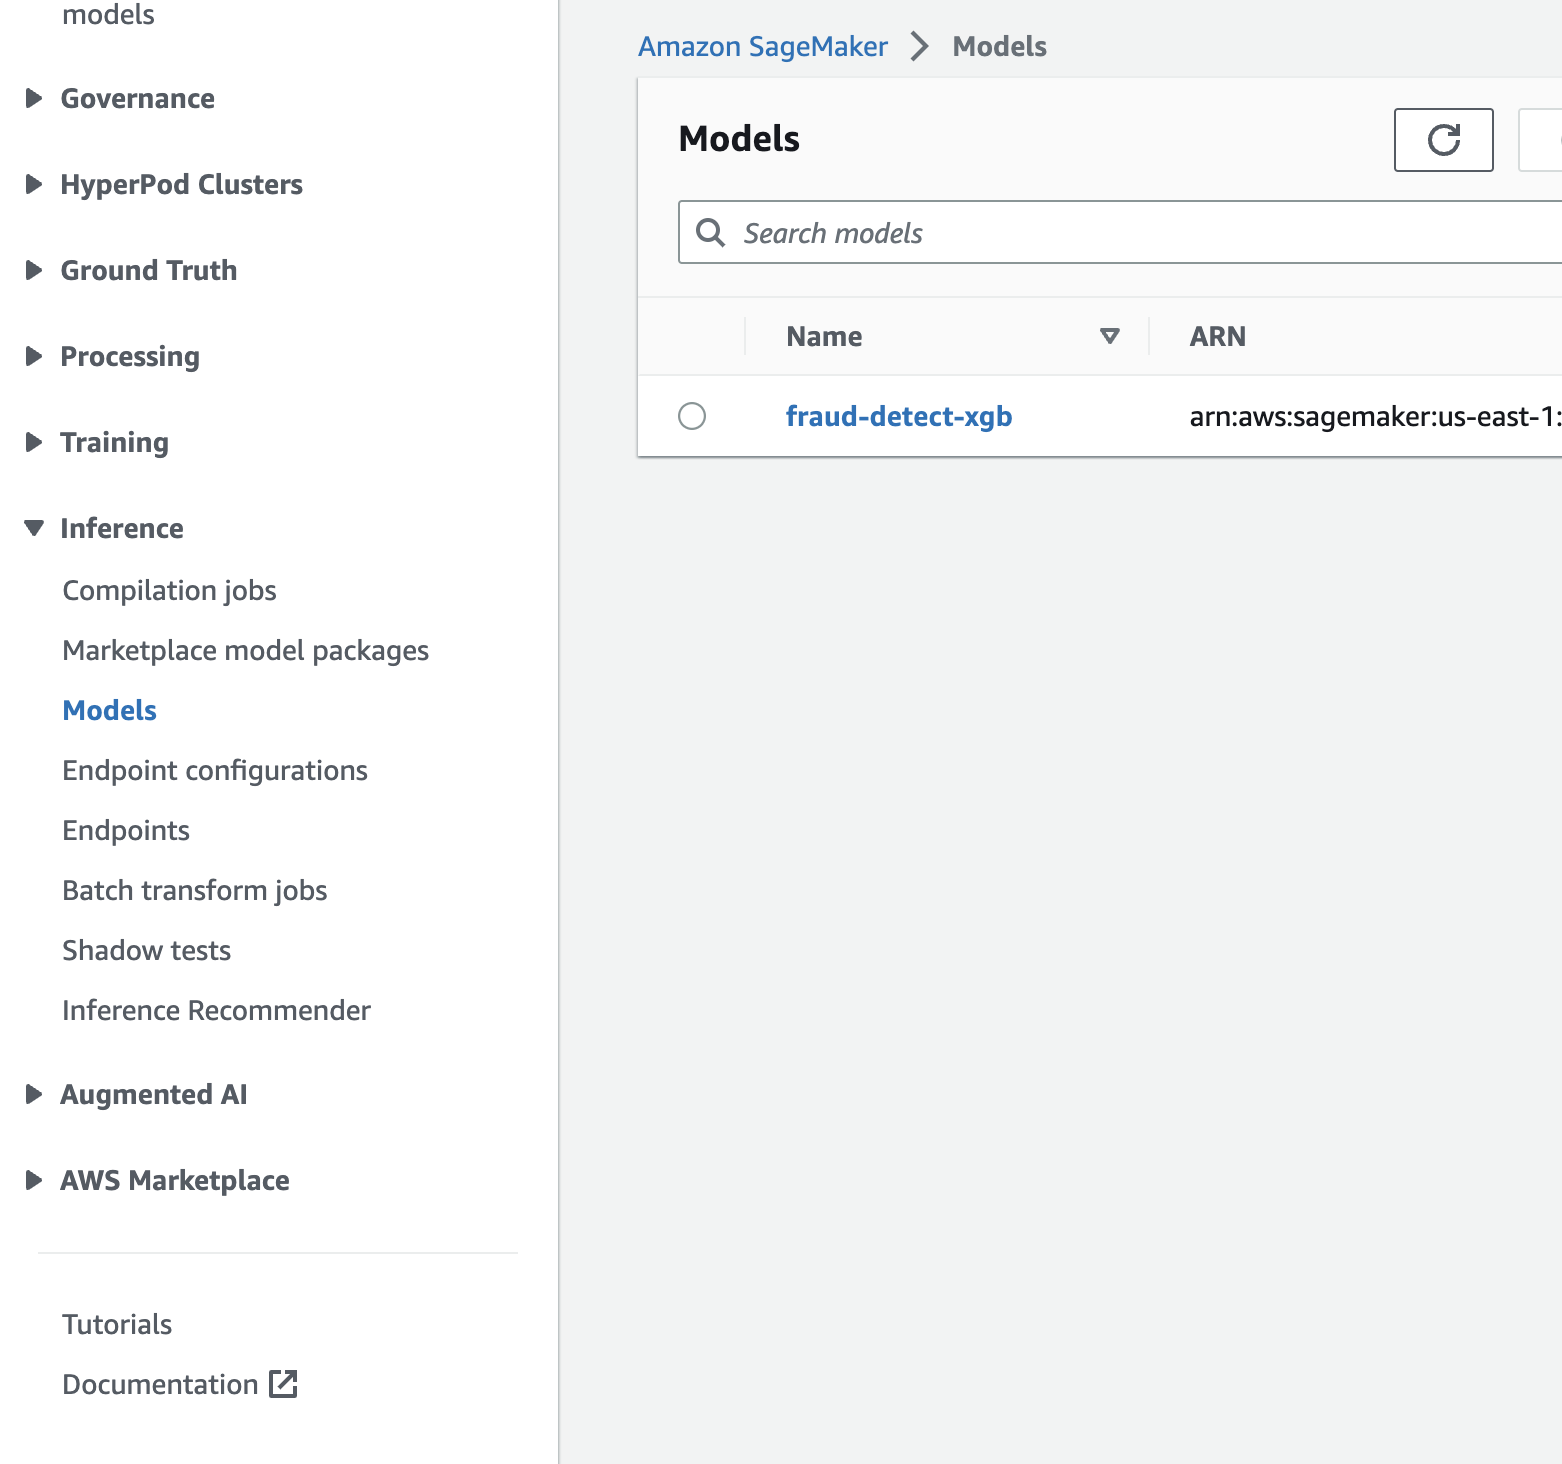
print(f"Model with name {model_name} already exists! Change model name to create new")SageMakerコンソール > Inference > Modelsを開き、モデルが生成されていることを確認する
Endpoint configの生成
SageMakerモデルが作成された後、Boto3のcreate_endpoint_configメソッドを使用してエンドポイントを設定するために、指定されたコードをコピーして実行するように指示されています。このメソッドの主な入力は、エンドポイント構成の名前、推論に使用するインスタンスタイプやインスタンスの数、デプロイするモデルの名前、エンドポイントが処理するトラフィックの割合です。
さらに、DataCaptureConfigを指定することで、データキャプチャ機能を設定できます。これにより、リアルタイムエンドポイントがリクエストやレスポンスをAmazon S3に保存し、モデルモニタリングの設定の一環として利用できます。この機能は、ベースラインメトリクスやモニタリングジョブと組み合わせることで、モデルのパフォーマンスを監視し、モデルやデータの変動に基づいて再訓練をスケジュールしたり、監査目的で使用されます。今回の設定では、入力データ(テストデータ)と出力データ(モデルの予測結果)の両方がデフォルトのS3バケットに保存されます。
# Endpoint Config name
endpoint_config_name = f"{model_name}-endpoint-config"
# Endpoint config parameters
production_variant_dict = {
"VariantName": "Alltraffic",
"ModelName": model_name,
"InitialInstanceCount": 1,
"InstanceType": "ml.m5.xlarge",
"InitialVariantWeight": 1
}
# Data capture config parameters
data_capture_config_dict = {
"EnableCapture": True,
"InitialSamplingPercentage": 100,
"DestinationS3Uri": data_capture_uri,
"CaptureOptions": [{"CaptureMode" : "Input"}, {"CaptureMode" : "Output"}]
}
# Create endpoint config if one with the same name does not exist
endpoint_config_matches = sm_client.list_endpoint_configs(NameContains=endpoint_config_name)["EndpointConfigs"]
if not endpoint_config_matches:
endpoint_config_response = sm_client.create_endpoint_config(
EndpointConfigName=endpoint_config_name,
ProductionVariants=[production_variant_dict],
DataCaptureConfig=data_capture_config_dict
)
else:
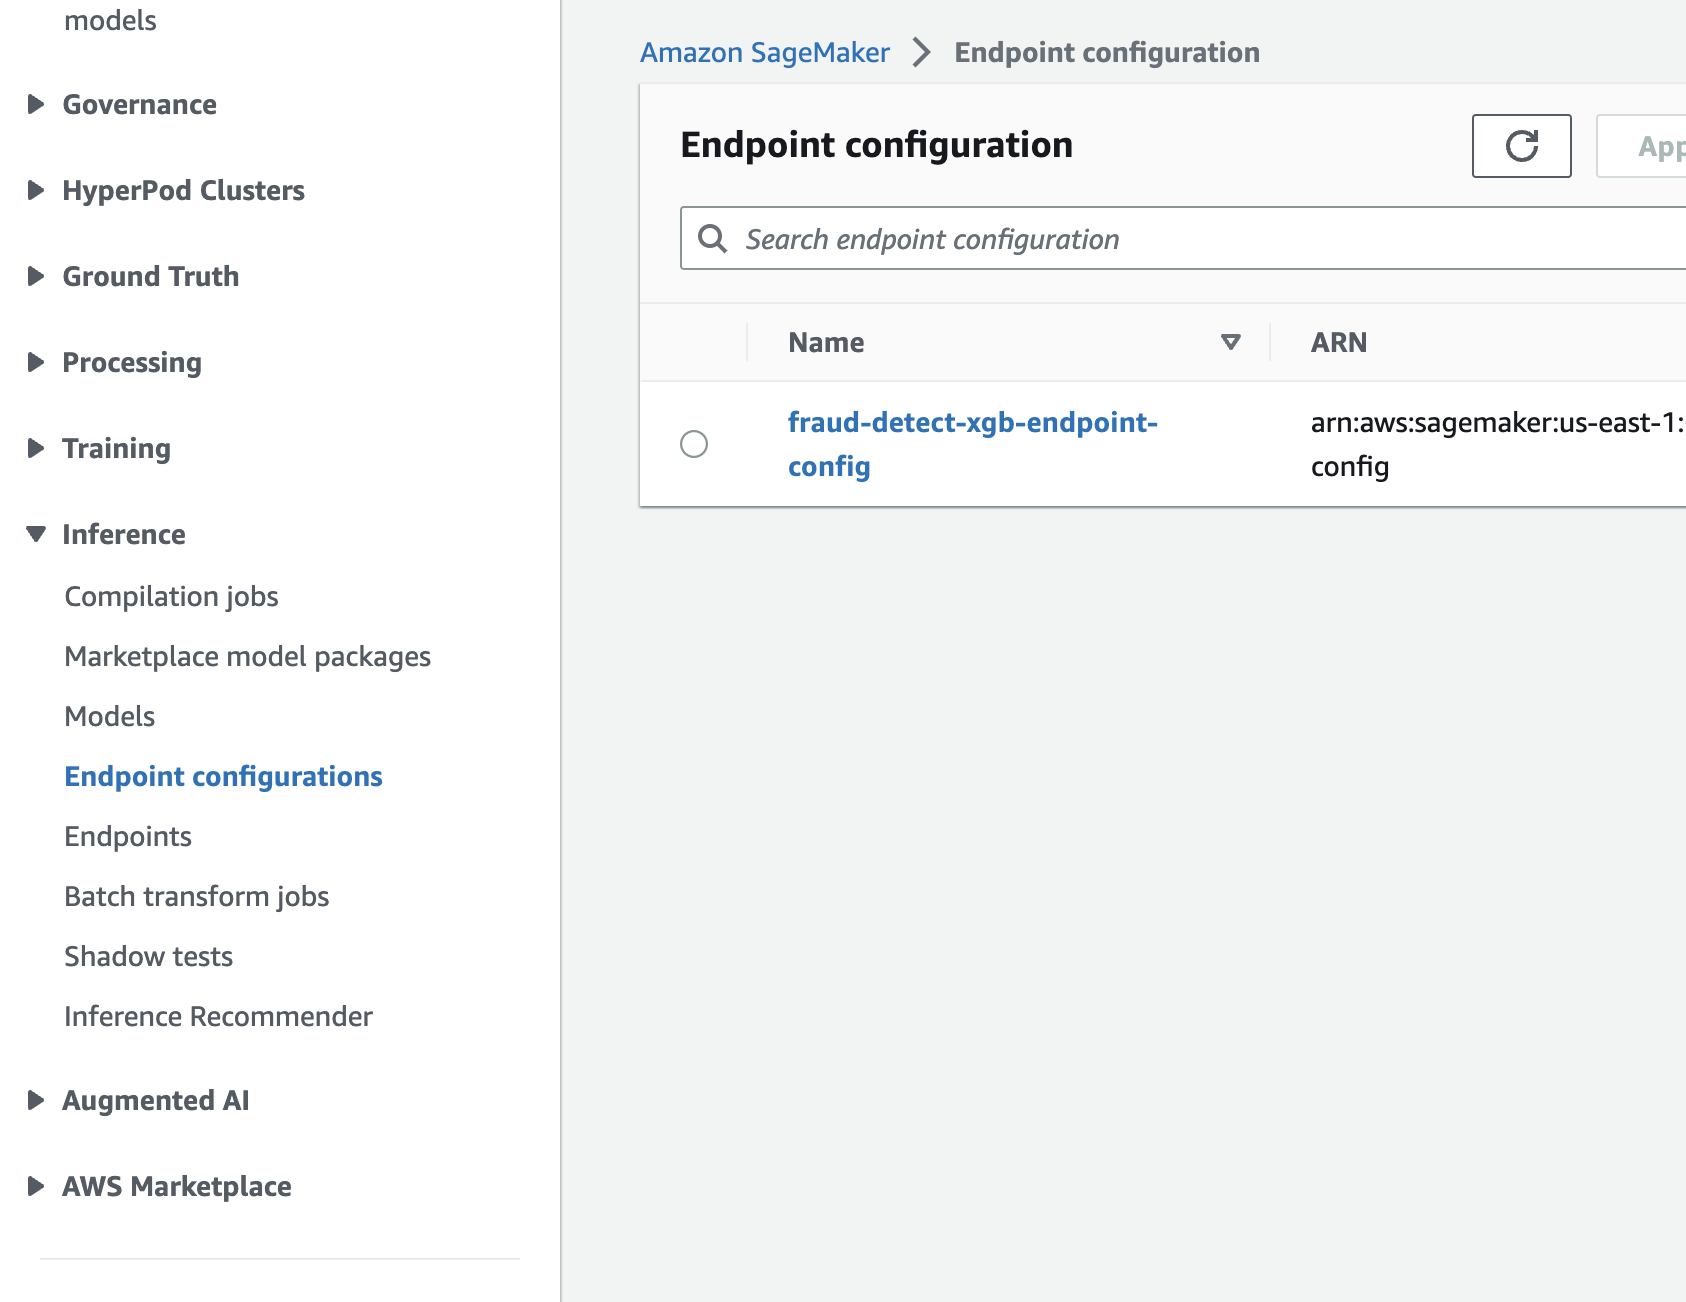
print(f"Endpoint config with name {endpoint_config_name} already exists! Change endpoint config name to create new")SageMakerコンソール > Inference > Endpoint configurationsを開き、Endpoint configが生成されたことを確認する
Endpointの生成
endpoint_name = f"{model_name}-endpoint"
endpoint_matches = sm_client.list_endpoints(NameContains=endpoint_name)["Endpoints"]
if not endpoint_matches:
endpoint_response = sm_client.create_endpoint(
EndpointName=endpoint_name,
EndpointConfigName=endpoint_config_name
)
else:
print(f"Endpoint with name {endpoint_name} already exists! Change endpoint name to create new")
resp = sm_client.describe_endpoint(EndpointName=endpoint_name)
status = resp["EndpointStatus"]
while status == "Creating":
print(f"Endpoint Status: {status}...")
time.sleep(60)
resp = sm_client.describe_endpoint(EndpointName=endpoint_name)
status = resp["EndpointStatus"]
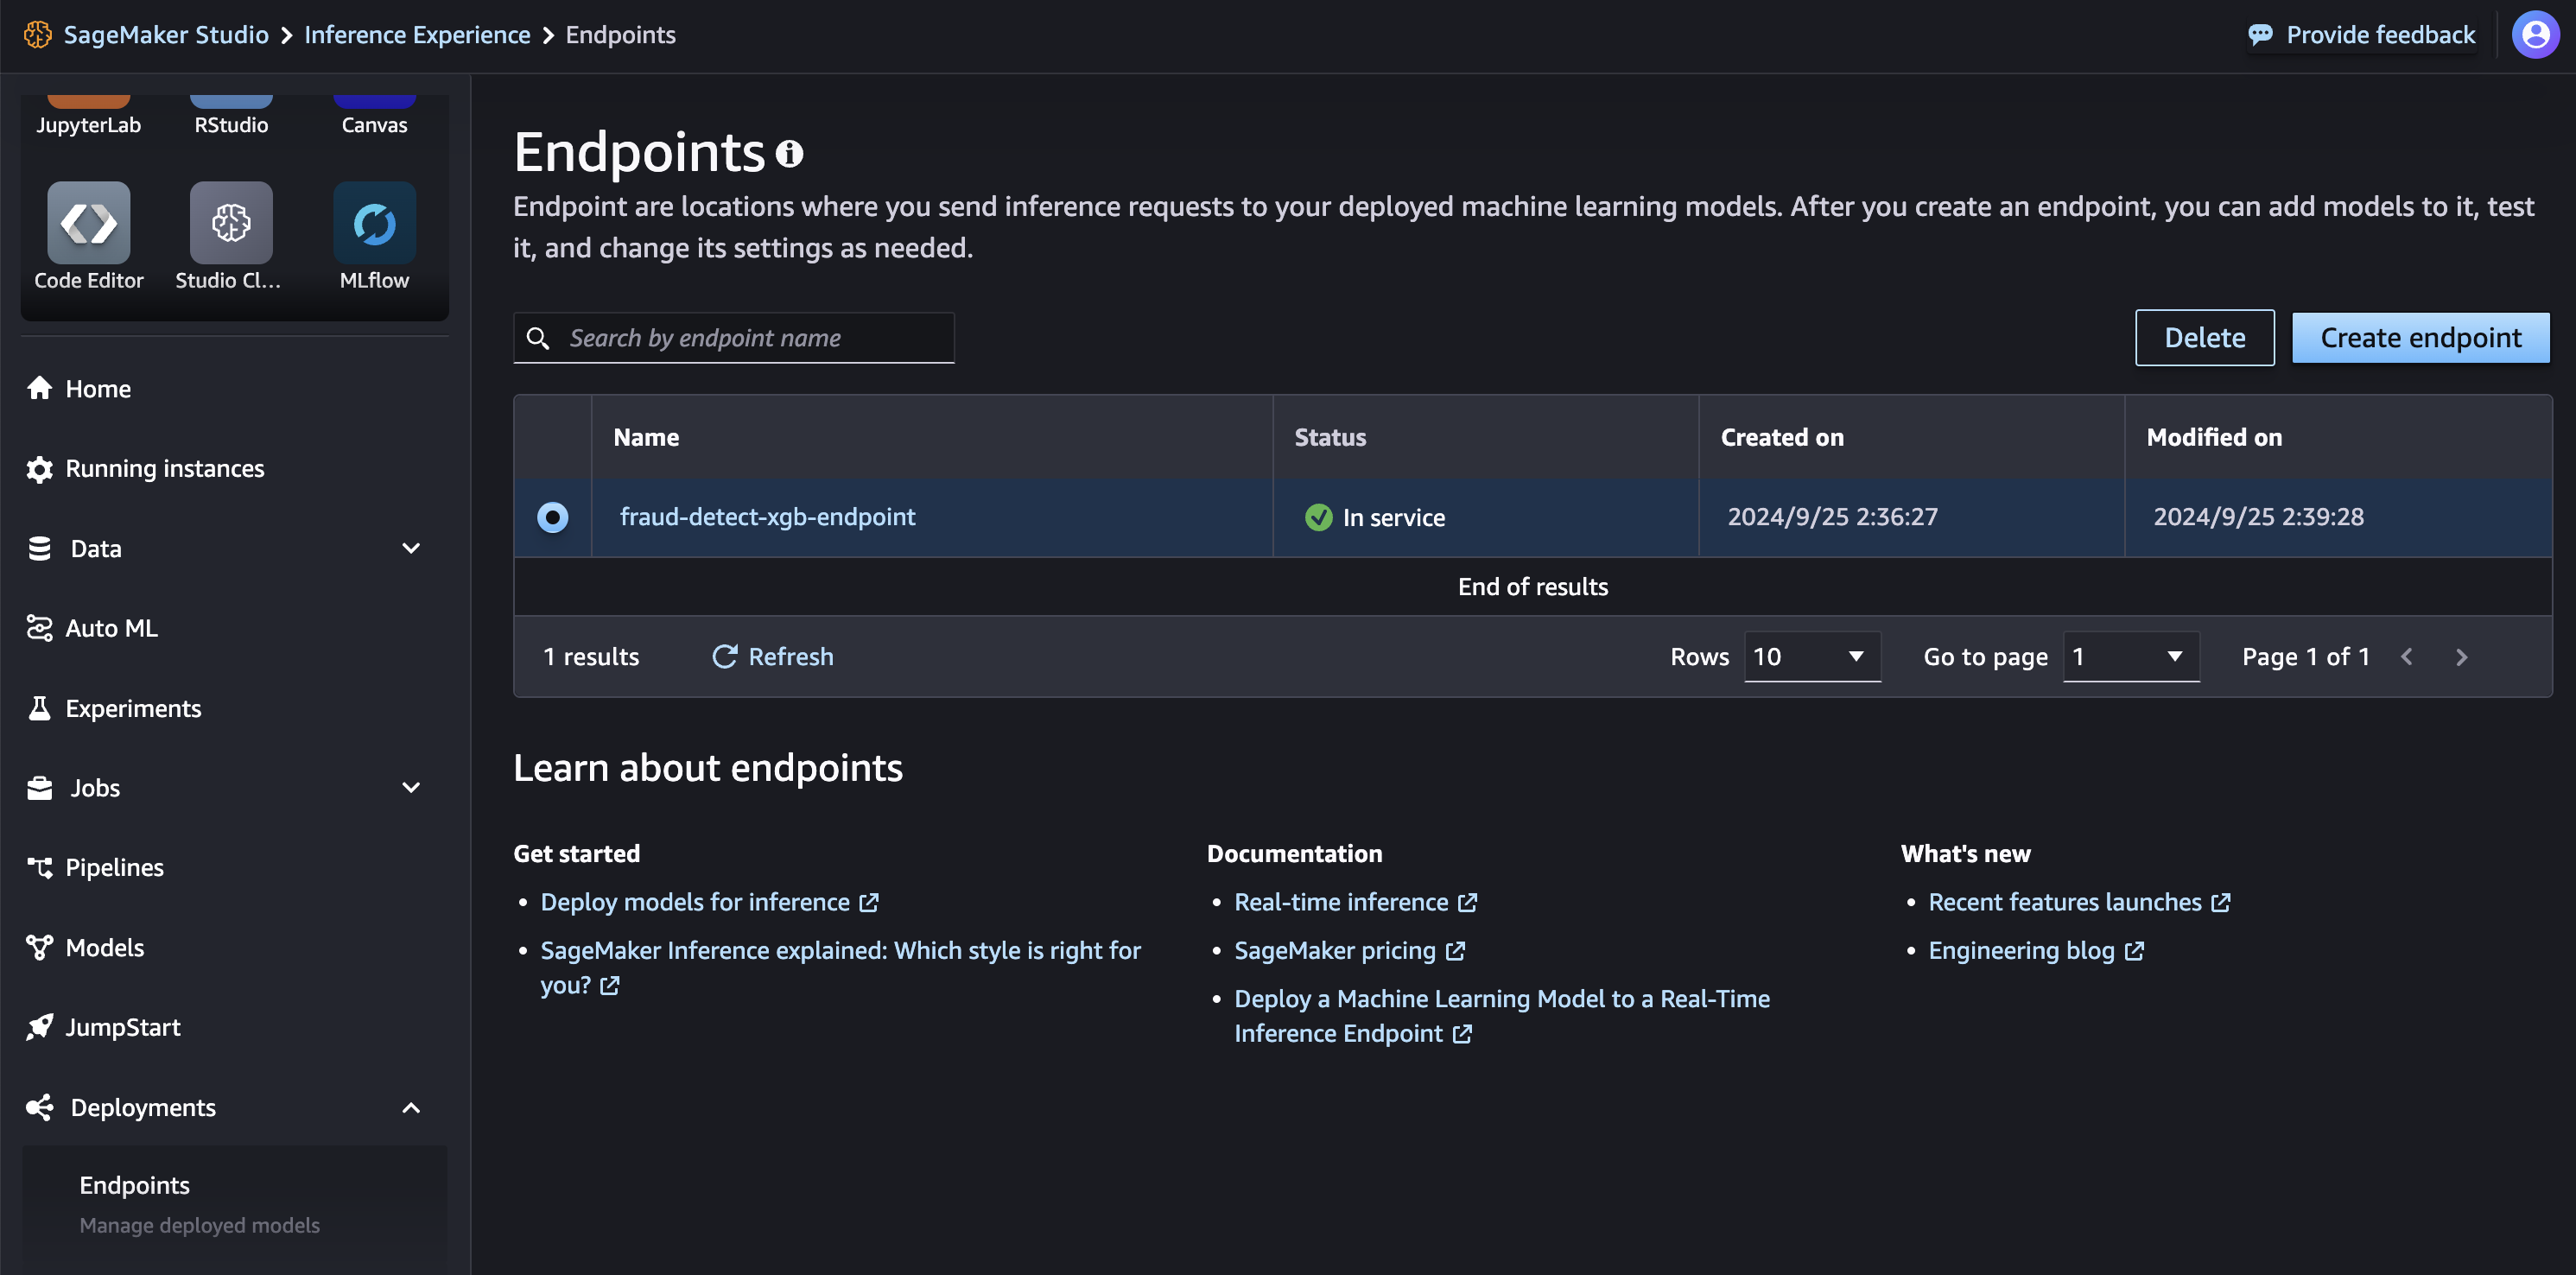
print(f"Endpoint Status: {status}")SageMaker Studio > Deployments > Endpointsを開き、Endpointのステータスを確認する
Endpointでの予測の実行
エンドポイントのステータスが InService に変わった後、REST API、AWS SDK – Boto3、SageMaker Studio、AWS CLI、または SageMaker Python SDK を使用してエンドポイントを呼び出せます。このチュートリアルでは、AWS SDK – Boto3 を使用します。エンドポイントを呼び出す前に、テストデータをエンドポイントに適した形式に変換する必要があります。シリアライズは、CSVなどの形式の生データをバイトストリームに変換し、デシリアライズはその逆のプロセスです。このチュートリアルでは、テストデータの最初の5つのサンプルを使ってエンドポイントを呼び出し、予測結果を取得します。リクエストデータはCSV形式で、シリアライズしてペイロードを作成し、応答をデシリアライズして予測結果を取得します。XGBoostモデルは確率を返し、予測結果はテストサンプルの実際のラベルと一致していることが確認されます。
# Fetch test data to run predictions with the endpoint
test_df = pd.read_csv(test_data_uri)

# For content type text/csv, payload should be a string with commas separating the values for each feature
# This is the inference request serialization step
# CSV serialization
csv_file = io.StringIO()
test_sample = test_df.drop(["fraud"], axis=1).iloc[:5]
test_sample.to_csv(csv_file, sep=",", header=False, index=False)
payload = csv_file.getvalue()
response = sm_runtime_client.invoke_endpoint(
                                             EndpointName=endpoint_name,
                                             Body=payload,
                                             ContentType="text/csv",
                                             Accept="text/csv"
                                            )

# This is the inference response deserialization step
# This is a bytes object
result = response["Body"].read()
# Decoding bytes to a string
result = result.decode("utf-8")
# Converting to list of predictions
result = re.split(",|\n",result)

prediction_df = pd.DataFrame()
prediction_df["Prediction"] = result[:5]
prediction_df["Label"] = test_df["fraud"].iloc[:5].values
prediction_df
0 0.02243666537106037 0
1 0.02243666537106037 0
2 0.0799826979637146 0
3 0.13931523263454437 0
4 0.03112351894378662 0
s3のデータキャプチャ結果の確認
エンドポイント設定でデータキャプチャが有効になっているため、エンドポイントに送信されたペイロードとその応答を確認できます。キャプチャされたデータがS3に完全にアップロードされるまでには時間がかかります。データキャプチャが完了したかどうかを確認するためのコードを以下にコピーして実行します。
from sagemaker.s3 import S3Downloader
print("Waiting for captures to show up", end="")
for _ in range(90):
    capture_files = sorted(S3Downloader.list(f"{data_capture_uri}/{endpoint_name}"))
    if capture_files:
        capture_file = S3Downloader.read_file(capture_files[-1]).split("\n")
        capture_record = json.loads(capture_file[0])
        if "inferenceId" in capture_record["eventMetadata"]:
            break
    print(".", end="", flush=True)
    time.sleep(1)
print()
print(f"Found {len(capture_files)} Data Capture Files:")キャプチャされたデータは、エンドポイントの呼び出しごとにS3に別々のファイルとして保存され、JSON Lines形式(各行がJSON値の構造化データ)で保存されます。データキャプチャファイルを取得するためのコードを以下にコピーして実行します。
capture_files = sorted(S3Downloader.list(f"{data_capture_uri}/{endpoint_name}"))
capture_file = S3Downloader.read_file(capture_files[0]).split("\n")
capture_record = json.loads(capture_file[0])
capture_record以下のコードをコピーして、base64を使ってキャプチャファイルのデータをデコードします。このコードは、送信された5つのテストサンプルのペイロードとその予測結果を取得します。この機能は、エンドポイントの負荷とモデルの応答を確認し、モデルのパフォーマンスを監視するのに役立ちます。
input_data = capture_record["captureData"]["endpointInput"]["data"]
output_data = capture_record["captureData"]["endpointOutput"]["data"]
input_data_list = base64.b64decode(input_data).decode("utf-8").split("\n")
print(input_data_list)
output_data_list = base64.b64decode(output_data).decode("utf-8").split("\n")
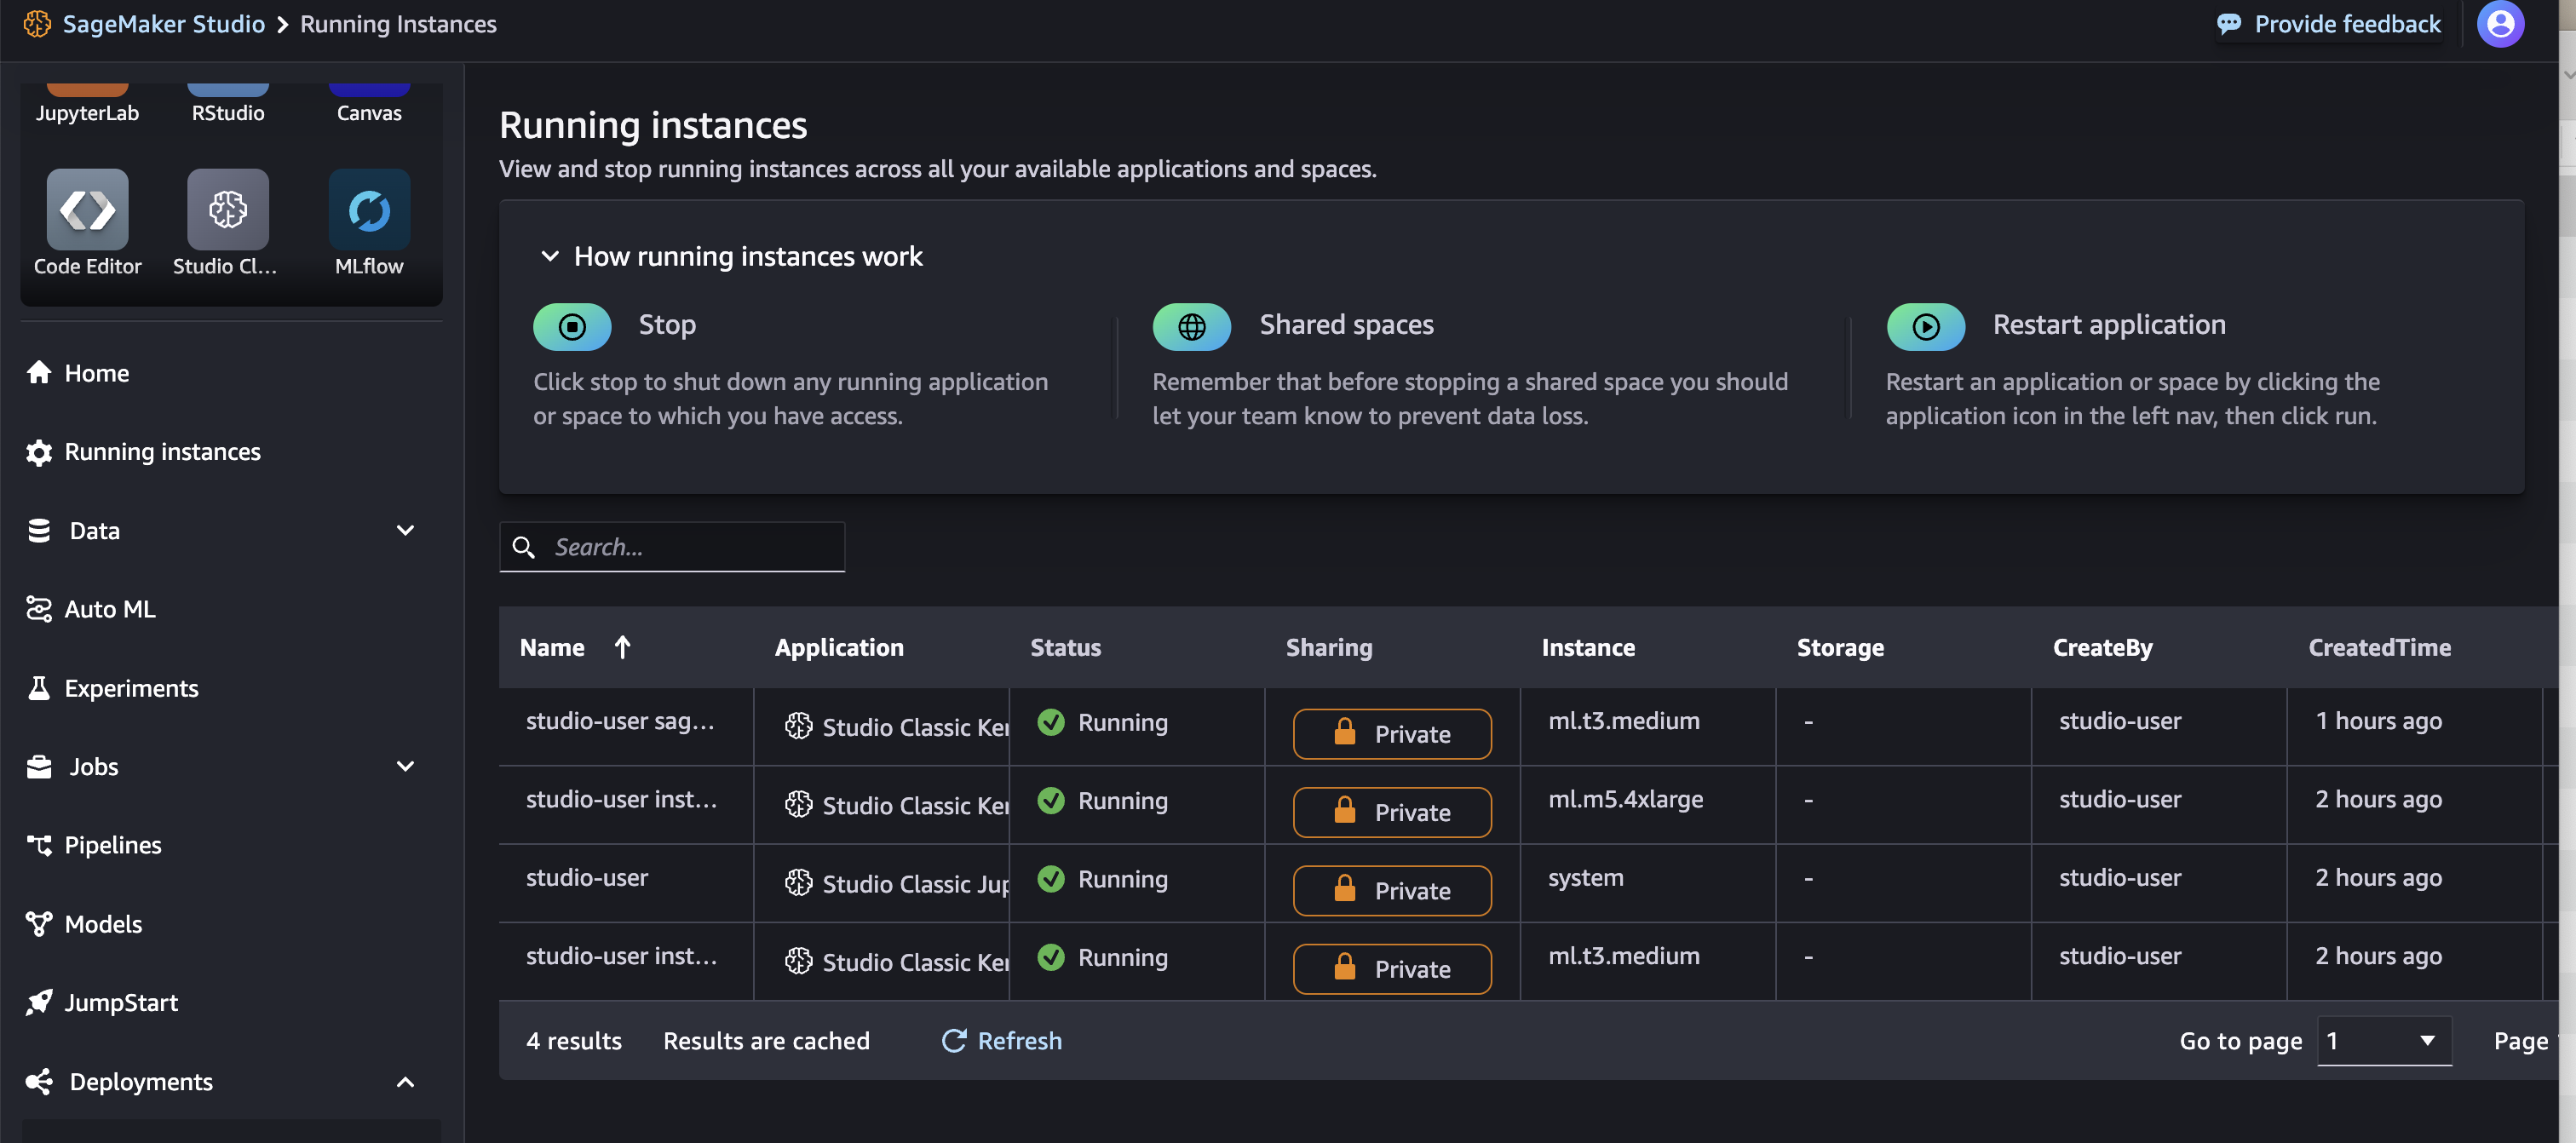
print(output_data_list)実行中のインスタンス
大きいインスタンスが生成されているので、使用後は停止する必要がある
リソースの解放
Model, Endpoint config, Endpointを削除する
# Delete model
sm_client.delete_model(ModelName=model_name)

# Delete endpoint configuration
sm_client.delete_endpoint_config(EndpointConfigName=endpoint_config_name)

# Delete endpoint
sm_client.delete_endpoint(EndpointName=endpoint_name)